


7. Pay attention to output logic levels and drive capabilities
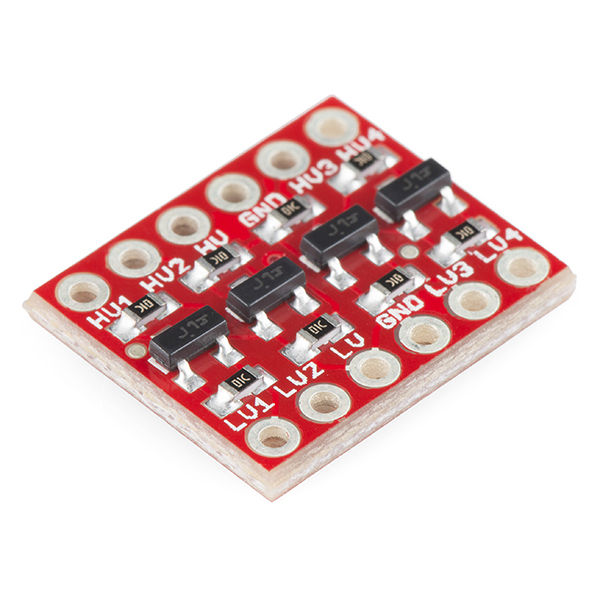
The Raspberry Pi uses 3.3 V logic levels. It’s a small but important detail that is often overlooked. The 3.3 V logic levels mean that the Pi may not work with the many devices and accessories available that require 5-volt logic. Also, its drive current is 16 mA on each pin, provided the total current doesn’t exceed approximately 50 mA. This problem is very easy to overcome with a logic level converter like the BOB-12009 bi-directional converter from SparkFun.
8. The Python programming language
Python is the default programming language for Raspbian. In fact, the Raspbian image comes pre-loaded with the Python development environment, IDLE (Integrated Development and Learning Environment). Working with Python is going to be essential for most Pi projects.


Within Raspbian, there is the option of using either IDLE 2 for running Python 2 or IDLE 3 for running Python 3. Go with IDLE 3/Python 3 to stay current and get the latest documentation.
Note that Python 2 and 3 code are not directly interchangeable. There is a lot of Python 2 code out there, so it may be tempting to go back to it from Python 3, but there are several differences in syntax and naming conventions that make the two versions directly incompatible. However, if the decision is made to change, it is possible to sift through code and make the changes needed to convert Python 2 code to Python 3 and vice-versa.
The fastest way to start building personalized GUIs for Python programs is a set of tools called TkInter, which is already bundled with Raspbian. There are a lot of short tutorials online for TkInter to help a user get started quickly.
For those new to programming in general, it’s advisable to break the project down into basic building blocks. For example, take a project that involves outputting to an LCD, reading from an SPI-connected sensor and getting user inputs from three buttons. Write a separate piece of code for each task. Writing it all at once may lead to errors and make debugging harder.
9. Screen size

When programming, use a large display instead of a tiny 3-inch display that sits on top of the Pi as they are difficult to read. While good for a final custom interface for a project, it’s better to have a full-sized monitor or even a 7-inch touchscreen display like the 8997466 LCD from the Raspberry Pi Foundation (Figure 8). Depending on which Raspberry Pi is being used, this display may not be auto-detected through the DSI connector. If the Pi model requires the screen to be manually enabled, Github documents this procedure.
That said, a full-sized monitor is preferable. Also, a display that plugs into the DSI or HDMI port is going to be a lot faster than a display that is controlled thru the general-purpose I/O port.
- Quick tips and remedies
- It may be tempting to get an SD card larger than 32GB. If so, make sure to format the card as an FAT32 file system. The Raspberry Pi can only read FAT32 volumes.
- Make sure the SD card is proven compatible with the Raspberry Pi.
- If stuck at the command line, run the command “sudo start x” to start the GUI.
- The Raspberry Pi GPIO pins aren’t marked. To avoid confusion get a GPIO reference like this one from Seeed.

- Don’t power the Raspberry Pi through the GPIO pins. It can be done, but it means bypassing the onboard fuse. The fuse is self-resetting and can be replaced if necessary. If power is routed through the GPIO and something pops, it will in all likelihood have destroyed the Pi.

If using a Raspberry Pi for development, backup all files. It is likely that at some point the image on the SD card will get corrupted, making the data unrecoverable. Sidestep the risk altogether by using a USB jump drive such as Apacer’s APHA016G2BACG-DTM 16-Gigabyte USB drive as the file repository.

Conclusion
The Raspberry Pi is famously powerful, easy to use and well supported. It is an excellent foundation upon which to build a professional application or a fun project. Regardless of background and skill level, these tips will shorten the learning curve, accelerate time to market, and make the whole process more productive.